Creating A Panel
In order to create a ticket panel, head over to the web dashboard and select your server. If unfamiliar with how to do that, read our guide on the web dashboard here.
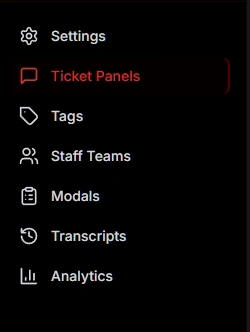
Once on your server's main settings page, select Ticket Panels in the navigation bar to be taken to the ticket panel configuration page which looks as follows:
You will see at the top of the page to Create a Single panel. Once you press the button you will be redirected to the create page.
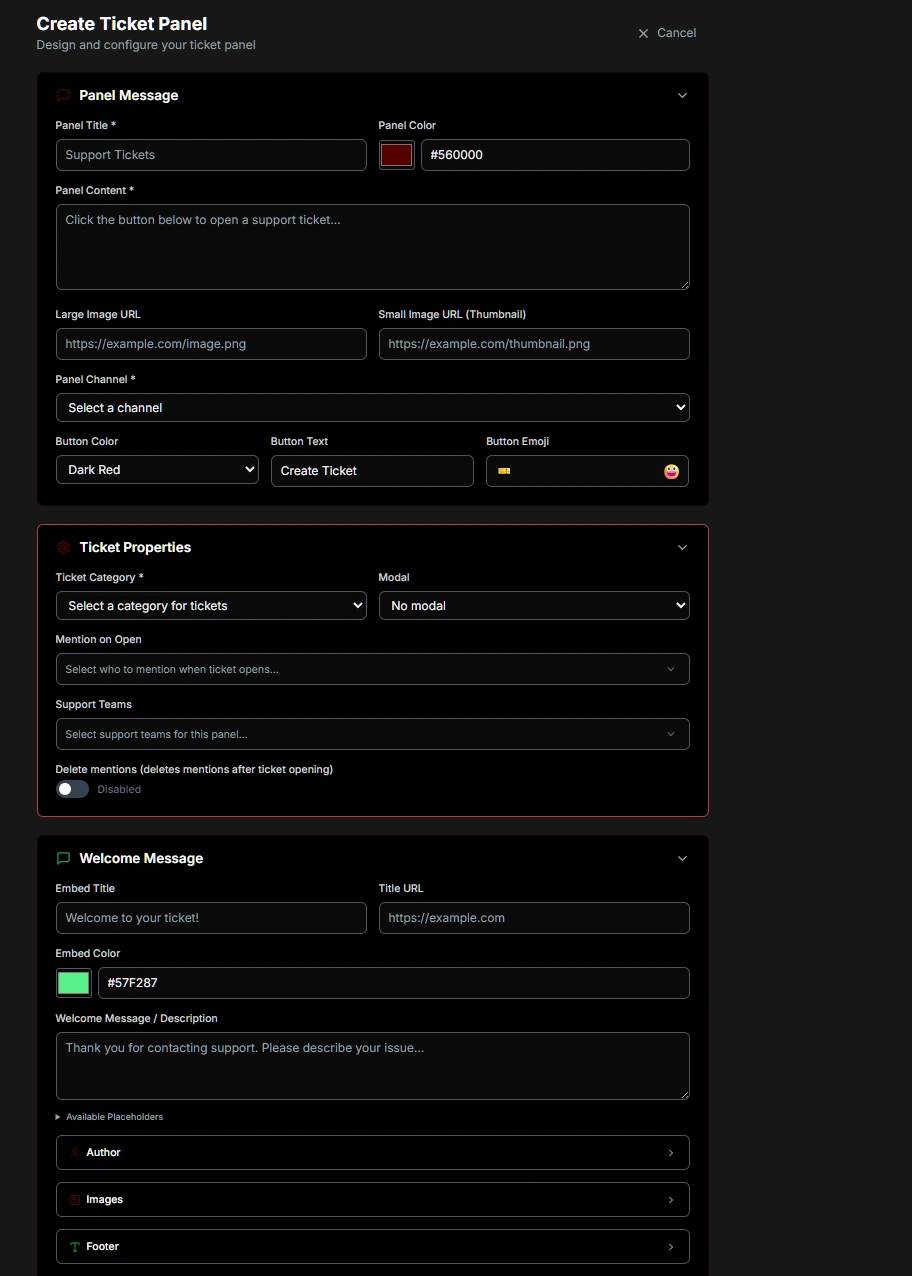
Once you are on the create page you will see all the options to customize the panel:
Ticket Properties
Mention On Open
Specify a list of roles/users to mention after the ticket is opened.
Note: This will not work for those who have their notification settings on mute.
Support Teams
Input which Staff Teams will handle tickets created from this reaction panel.
Ticket Category
Designates the channel category that the ticket channel will be created under. If you are unsure about what a ticket category is discord has a guide right here.
Ticket panels use different channel categories to the one configured on the main settings tab to allow for distinction when using multiple reaction panels - meaning it is possible to have each "type" of ticket open in it's own category for easier organization.
Naming Scheme
Currently the naming scheme is global and all ticket panels follow the naming scheme set in the settings tab.
Tickets Per User From This Panel
Optional per-panel cap on how many tickets a single user can have open from this specific panel. Leave the field blank to apply only the server-wide limit (set under Settings → Total Tickets Per User).
When both limits are set, both apply — a user must satisfy the server-wide cap and the per-panel cap to open a new ticket.
Examples:
- 5 total but only 1 support + 1 bug-report at a time → Server-wide
5, Support1, Bug Report1 - 1 per panel, no overall cap → Server-wide blank, every panel
1 - 1 ticket total anywhere on the server → Server-wide
1, all panels blank
Transcript Channel
Optionally route this panel's transcripts to their own channel. When a ticket from this panel closes, its transcript is sent to the channel selected here instead of your server-wide transcript channel.
Leave it on “Use server default” to fall back to the server-wide transcript channel. Available on both the create and edit pages. Learn more under Transcripts.
Access Control
Access Control lets you decide, per Discord role, who is allowed to open a ticket with a panel. You build an ordered list of Allow / Deny rules in the panel editor, and the bot checks that list every time a member tries to open a ticket — including tickets opened through a multi-panel dropdown.
Building the list
Manage the rules from the Access Control editor in the Ticket Properties section of the panel:
- Add a role by selecting it from the “Add another role...” input. The new entry is appended to the bottom of the list and starts as Allow.
- Toggle an entry's action to switch it between Allow and Deny.
- Reorder an entry with the up and down controls to move it earlier or later in the list. Order matters (see below).
- Remove an entry with the X control to delete it from the list.
How rules are evaluated
Entries are evaluated top to bottom, and the first match wins: the first entry whose role the member has decides the outcome, and no entry below it is considered. A member can have several roles in the list — only the highest matching entry applies.
The @everyone role always matches every member, so an @everyone entry placed at the bottom acts as a catch-all for anyone the rules above didn't cover.
If a member matches no entry in the list, the No-Match Default is Allow — ticket creation is permitted. Add a trailing @everyone = Deny entry when you want to block everyone who isn't explicitly allowed above.
Example: an allowlist
This ordered list lets only Whitelabel, Patrons, and Nitro Booster members open tickets, while blocking anyone with the Muted role:
- Muted → Deny
- Whitelabel → Allow
- Patrons → Allow
- Nitro Booster → Allow
@everyone→ Deny
Because the first match wins, anyone with Muted is denied first — even if they're also a Whitelabel, Patrons, or Nitro Booster member. Whitelabel, Patrons, and Nitro Booster members hit their Allow entry and can open a ticket. Everyone else falls through to the trailing @everyone = Deny and is blocked.
Empty list = open to everyone
A panel with an empty or absent access control list is open to every member. This is the default, so existing panels keep working exactly as before unless you add rules.
No automatic bypass
The access control list applies to all members. There is no automatic bypass for Administrators or staff — your configured list is authoritative. If you want staff or admins to always be allowed, add an explicit Allow entry for their role above any @everyone = Deny catch-all.
Panel Message
Panel Title
The panel title is the bold text at the top of the embed.
The panel title has a maximum length of 255 characters, and by default, it is set to Open a ticket!.
Panel Content
The panel content is the text in the long description of the embed. We recommend providing a general overview of how your support system works, such as which languages the support agents are fluent in.
The panel content has a maximum length of 1024 characters.
Panel Colour
This sets the color of the left side of the embed. When clicked, a colour picker will open.
Panel Channel
This is the channel where the panel will be sent to that users can open a ticket with.
Warning: This should NOT be the same as your transcript channel.
Button Colour
Choose the colour of the button.
Button Text
Enter the text that the button will contain.
Button Emoji
This is the emoji that users will click in order to open a ticket. The emoji can either be:
- Pasted directly into the box, for example:
📩 - Or the Discord name can be used, for example:
envelope_with_arrow(colons are optional)
Custom emojis from your server can be used by clicking the toggle to show green instead of grey. When toggled on, the input field will show you a list of your available emojis to choose from.
Large Image URL
Input a URL link to an image here, it will display underneath the welcome message.
File path MUST end in .png. Easy trick: send the image as a message in a discord channel, then right click the message and choose "Copy Link." Paste link into the input.
Small Image URL
Input a URL link to an image here, it will display to the right of the welcome message.
File path MUST end in .png. Easy trick: send the image as a message in a discord channel, then right click the message and choose "Copy Link." Paste link into the input.
Welcome Message
The server's welcome message can be overridden on a per-panel basis using this field. If left blank, the welcome message from the main settings page will be used.
The message has a maximum limit of 4096 characters due to Discord limitations.
Placeholders can be used in the welcome message. View a list of placeholders here.
Discord message formatting can also be used to include links to channels, emojis, roles, or usernames in the welcome message.
To use Discord message formatting:
- Discord developer mode must be turned on - in your personal discord account settings > advanced > discord developer mode.
- Right click any channel name, username, message, etc and choose Copy ID.
- Use the structure section of discord's message formatting chart to include it in the welcome message.
Completion
Once the ticket panel has been configured, click Create and the panel will be created in the server. A success message should be shown in the bottom right hand corner of the screen if successful, or an appropriate error message if there was a mistake.
If any fields are left blank, the default values will be used.
Editing
Ticket panels can be edited at a later date. Simply click the Edit button in the list of panels and the editing modal will be opened:
A panel can also be deleted by clicking the Delete button, or deleting the message containing the panel in Discord. If only the message in Discord is deleted, the panel will continue to exist on the Web Dashboard and can be resubmitted to Discord if needed, by clicking the Post to discord button.